I wrote in my previous post about setting up the Delphi Starter Edition IDE (now that Embarcadero have released their new Community Edition, you should install that instead of starter) In this post we’ll take a look at creating a Windows forms application using Delphi.
Now that you have your Delphi IDE installed, you’re going to want to start working and learning all the exciting stuff you can do with it. Lets get started with the obvious first step of opening up the Delphi IDE.
Once opened, you’ll be greeted by the Delphi IDE’s welcome page.
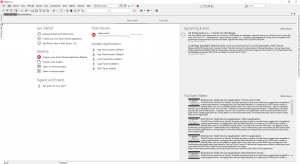
Next you’re going to want to create a new project, what we will do is create a multi device application. On the welcome screen under the “Develop” heading, click “Create new Multi-Device Application (Delphi)”.
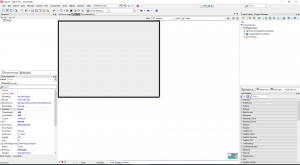
What you’re now looking at is a selection screen to choose a base template for the application. We’ll select “Blank Application”. We can now see the visual designer.
Lets get cracking
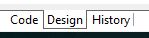
What you can now see is the visual design panel for your application which is where we can put our components that will be interacted with. At the bottom of the screen you will see the different available tab views, to the left of the design tab you will see the “code” tab. Clicking on this will show you the automatically generated code that the IDE creates for your new application.
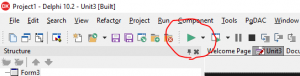
Although we haven’t actually done anything yet, your application is already in a state where it can be run which you can do by clicking the green play button near the top left of the screen.
What you should see is an empty grey window appear. Congratulations, there’s your first Delphi Windows form application. It doesn’t do anything right now though so its a bit boring. Lets have a look at some of the visual components that we can play with.
Using visual controls
Close down your empty window that launched and take a look at the design view. Unless you’ve been fiddling with the layout of your IDE, you can find a tool window called “Tool Palette” towards the bottom right corner of the IDE.
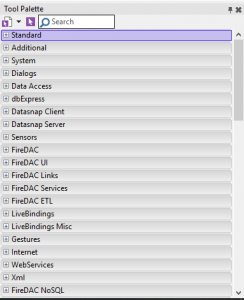
From here, we can drag things from the tool palette on to our form. If you expand the “Standard” tab, you’ll find all of the common controls such as labels, buttons, radio buttons etc.
Drag a button from the tool palette and drop it somewhere on the design form. What a lovely looking button that is… it won’t do anything particularly exciting without our help though.
Triggering code with events
Most components have various events that can trigger code, such as click, double click, keydown, gesture, and many more. You can see the events available for a component by clicking on the component (such as your button) once, then on the left hand side of the screen in the object inspector, click events.
All components have a default event that can be added by double clicking on it in the design view. If you double click on your button now, it will switch to code view and add a template procedure for the click event and assigns that procedure to the buttons onclick event.
Now that you have your caret (fancy word for text cursor, if you didn’t know) inside your new click procedure, copy and paste or type this code inside it;
ShowMessage( ‘This appears when clicking on the button’ );
>>> ShowMessage is a predefined procedure in one of Delphi’s many units, all it does is displays an alert box with given string text inside. Inside the brackets is where we would place the one parameter that the procedure needs, a string.
Now that you’ve added this, click the play button up the top (or ctrl+shift+F9). Your application will appear containing your button. When you hit your button…. oh my goodness its an alert box.
You’ll probably already have figured that the text inside the single quote marks with the “ShowMessage” code is the text that displays inside that alert box i.e. ShowMessage(‘Hello, world!’); would show the cliche message “Hello, world!” when the button is clicked.
Button text and attributes
“But wait” I hear you yell, “the label on this button is stupid and says ‘Button1!'”. When looking at your design view, click the button once and on the left hand side in the object inspector ensure that the “properties” tab is selected. These are all the attributes and properties of the button that can be changed. Scroll down til you find the property called “text” and change that to whatever you see fit and press enter.
The default text on a button when adding it to the form is whatever is assigned in the buttons “name” attribute. The name attribute is how we can refer to this button if we want to change one of these properties or work with it in some way.
If you go back to your buttons onclick procedure and add in there
Button1.Text := ‘Click!’;
>>> What we are doing here is assigning a string of characters “Click!” to the string property ‘text’ of Button1. In Delphi the colons equals operator is the assignment operator, which means you can use this to put information inside a property or variable. More on variables later.
and then run the application, clicking the button will now change the text on the button to… ‘Click!’ (surprise!). Obviously if you changed your buttons name or if you have multiple buttons on your form you will need to ensure “Button1” is replaced with whatever the name your button has. Check this by clicking on the button and checking the name property in the object inspector.
Lets look at textboxes
We can work with textboxes in the same sort of way. If you add a text box (called a TEdit in the palette) to your form (drag and drop from the tool palette), click once on the textbox and check the properties to find out the name (probably Edit1), once you have done this go back to your buttons click event and add this code or change your current ShowMessage method call:
ShowMessage(Edit1.Text);
Now run your application again, type your name in to the textbox and click your button. You can use a thing called text concatenation to get your app to say hello to you using this code:
ShowMessage(‘Hello, ‘+Edit1.Text);
Here you have a string which you are connecting to the string property from Edit1 by using the plus sign “+” which is the string concatenation character in Delphi.
Anyway, I don’t know about you but I could do with a drink. Have a play and see what else you can figure out. In my next post we’ll look at making something a bit more worthwhile.
1 comment